Sometimes, when the Microsoft Teams application updates, your default audio device settings or secondary ringer settings may change unexpectedly. Follow these steps to set up your audio devices and ensure your secondary ringer is correctly configured.
Setting Up Your DEFAULT Audio Device in Teams
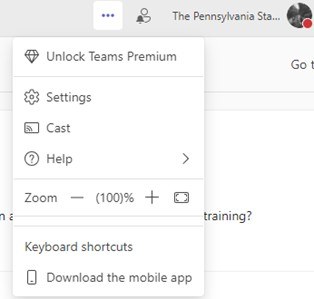
- In the top right corner of the Microsoft Teams application, click the three dots to the left of your photo or initials, select Settings

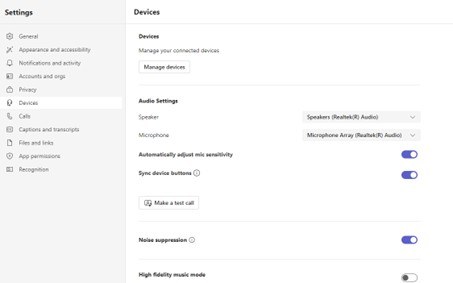
- Under the Settings column, select Devices.

- In the Audio Settings area, choose your desired speaker and microphone from the available options.
- Test Your Setup (Optional): Confirm everything is working by clicking the "Make a test call" button.
* If you always have a headset connected to your computer, setting up a secondary ringer can be useful so you don’t miss incoming calls when you’re not wearing the headset. See the next section for those steps.
Setting a Secondary Ringer Output
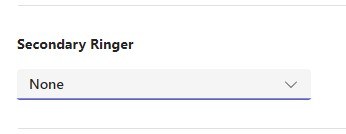
- In the same Devices area, scroll down to locate the "Secondary Ringer" setting.

- Select Secondary Ringer: Adjust the setting to allow your computer speakers to serve as the secondary audio device.
* Now you're all set to manage your audio settings smoothly even after a Teams update!
October 2024

